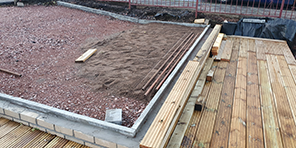
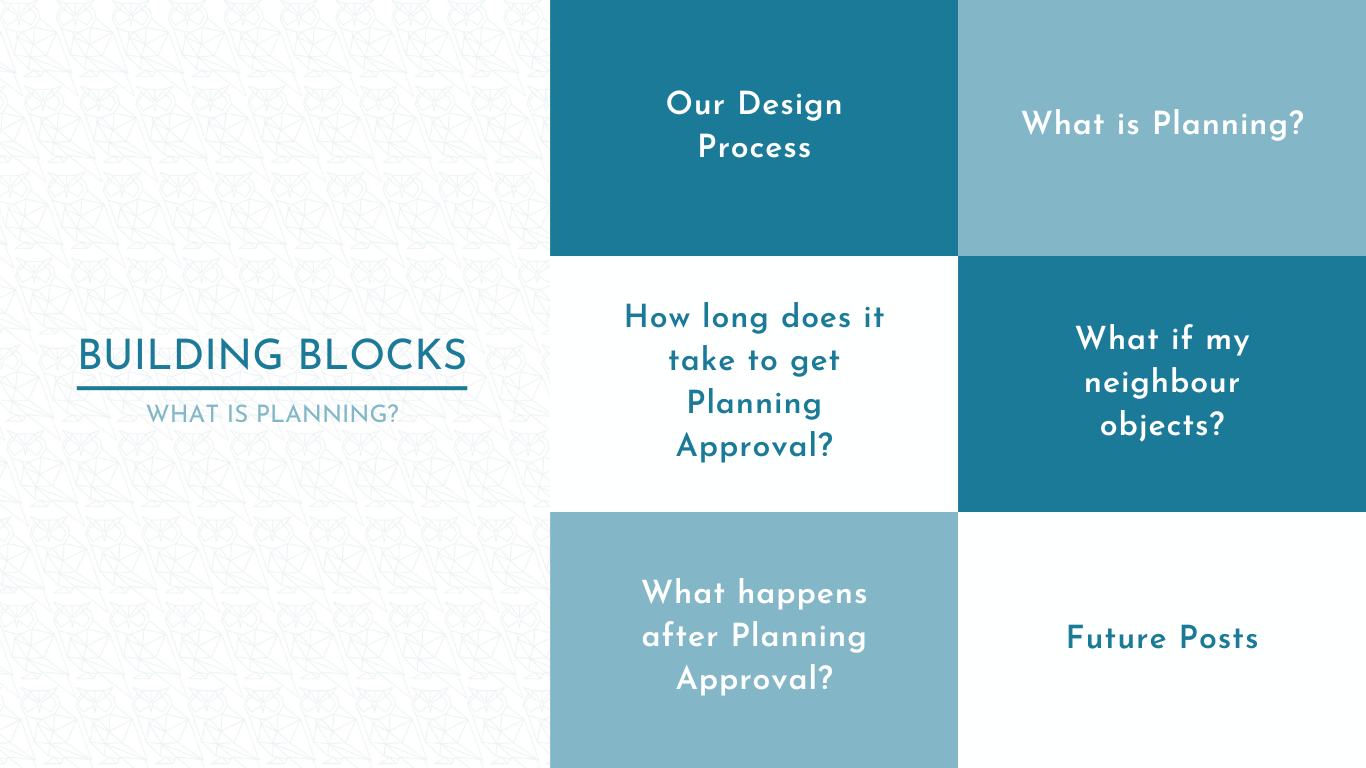
Bathroom Overhaul Challenge!

We have set ourselves a budget of £750 to overhaul our bathroom before Christmas.

Having been in the house for 3 years now we have yet to touch the bathroom and it is in dire need of TLC. So much so we are embarrassed to have people in our house it is so grotty and run down. The bathroom is a bad reflection on us. We are guessing (sort of hoping) we are not the only ones that have let there bathrooms fall into a state.

Yes, we are dreading sharing the existing video but here it is!

Put simply, we do not have the money to be spending thousands of pounds on a bathroom, with 2 kids under 5 more than willing to destroy what they can and especially when we may want to change the bathroom in a few years if we are able to do the renovation work we have planned in the future.

We are going to use this wee mini project as a way to showcase our interior design services. We will put our money where our mouth is if you will and hopefully show people that it doesn’t always have to cost the world to change and enhance your surroundings.

If you like what you see at the end up and would like to do something similar, but with Lorna’s help, get in touch and you too could have a new fresh bathroom set up for the family coming round this Christmas!

Please see our Interior Design prices.

How do you know if you have Asbestos in your house?

We have to be truthful and say that when we bought our house we did not consider the amount of Artex used throughout the property! We got caught up in how much we liked the location, the potential of the site etc and didn’t look at the place as forensically as we would do if we were helping a client. It seems odd but the emotional attachment of a house move definitely takes over if you let it (something for us to remind ourselves of when moving next).

Despite this potential problem we do love the house and we now look at asbestos removal as merely a step we have to consider before looking to make changes, albeit a potentially expensive step.

Hall Wall artex.jpg

Our Before House Tour Video shows you more of the offending Artex throughout the house and gives you an idea of the internal alterations and extension we have planned in the future.

The Artex in our house steadily became a major source of paranoia for us as the months, following our house move, went by. The worry of harming ourselves and our daughter’s health plus a looming bill to rectify it if there was indeed Asbestos present did keep us awake on more than one occasion. This caused us to act well before we are ready to disturb any walls or ceilings.

Our first port of call was to learn more about the subject and to source local experts on removal. This involved typing questions such as “What is Asbestos?” “Why is it dangerous?” “Where does it reside in the house?” “What do you do if you find it”. The more informed we were the less panicked we became which was comforting. The next step was to get quotes from 3 local companies.

We found this process to be time consuming and without criticising a particular company in public, we will warn you that the level of detail required before a quotation is considered can be extensive so be prepared to answer lots of questions about your property. It is not simply a case of leaving your name and contact details and where you want tested for some companies.

We are being a bit harsh as we totally understand the better the information given the more relevant the quote, however, we thought close to 40 questions to fill in was a bit excessive in one instance.

We ended up going with JAX Asbestos Specialists as they seemed to understand the nature of our enquiry and they responded quickly and concisely plus the price was very reasonable. We would be happy to share the varying quote prices to our clients should they require this information ahead of their own testing.

JAX agreed to come out to take samples of 5 areas within our house. The hall walls, living room ceiling, bathroom ceiling, our master bedroom and Luna’s bedroom.

At the outset, we were made aware that depending on the type of renovation work that's being done to the property, we may actually be better with an ‘Asbestos Refurbishment Survey Report’ which provides further detail and gives you a full report for any contractors to refer to. However, we decided that as the main works affect only one wall, we would be cheaper to get only the sampling done at the moment. Then if the wall turns out to have an asbestos coating, we would go back to get a quote to remove it prior to any works.

Jax Asbestos Specialist Van.jpg.png

We arranged a mutual date for JAX to come out and they arrived on time and they set up outside putting on all the proper PPE before entering the property which we admired as we have heard of instances of other companies taking a more relaxed approach shall we say.

Testing Artex for Asbestos.png

The sampling took about half an hour and the guys said we would be issued with an invoice and sent the results within the coming days. Fast forward 24 hours and we had our results and we were delighted with the outcome, “No Asbestos Detected” for each of the 5 samples! Furthermore, the ‘Certificate of Analysis for Bulk Identification’ we were given is great to hold onto for any contractors we are going to use, so that was great.

Useful Asbestos Information

Rather than give you a guide on what Asbestos is and talk about its dangers we feel it wise to leave that to the experts by linking a few websites instead:

JAX Asbestos Specialists You can find information on the company we chose, asbestos and read customer case studies by visiting their site.

The HSE website will give you comprehensive Asbestos information. The site gives guidance to all tradesmen, public, building owners, tenants and licensed asbestos contractors.

For further reading we also liked Asbestos.com (albeit it is an American site so UK readers should be mindful of that when reading).

Houlet's Nest - Clutter Island!

Following on from our ‘Garden Renovation’ background and project planning post the other week we are now going to document how we went about starting work on our garden (We’d recommend you read the previous article before this one if you haven’t already).

Lorna and Norrie went back and forth on how best to attack the plans for the new layout and it was decided we would clear the site as best as possible - getting rid of a lot of concrete, slabs and blocks whilst also cutting out a section of the grass area which would eventually be part of the decking space.

Clutter Island!

The first stage therefore was to clear the site of as much rubbish as we could. We did not fathom there to be quite as much clutter and sheer tonnage as there turned out to be. It just kept coming!

Neil broke up all the concrete in the garden as best he could and shifted it to the side of the driveway in anticipation of ordering a skip.

Demolition Driveway

Neil and Norrie added to the concrete by demolishing the driveway of all slabs and edging stones to uncover the earth below. As the pictures show there is still a long way to go in terms of setting out levels and creating the depth for a retaining wall at this stage.

We hired a skip for a week and proceeded to fill it with an assortment of rubble, soil and wood. We perhaps over filled it in the end and the skip company perhaps wasn’t best pleased with the weight.

Skip 1 getting filled.png

Neil and Norrie also took to the grass section which is to be replaced by decking. This involved taking down the surrounding wall and digging to floor level.

This task made us aware of the clothes pole, which you can see just above the grass cut out in the picture below, and we decided it would need to come down sooner than expected as it was in the way.

Some of the soil from the dig we put in the skip, the rest we put behind the shed at the side of the garden.

Pole Chancer

Lorna’s dad, Jim, kindly made himself available one day to help with the removal of the clothes pole. He and Neil worked for a couple of hours, at least, digging and drilling into the concrete block at the bottom of the clothes pole. It was tough and a bit of a nightmare job considering it was one clothes pole that they were trying to remove.

When their hard work looked to be paying off and the pole started moving around… up stepped Lorna to pull the thing out the hole! Jim and Neil watched on exhausted as Lorna took the glory.

Tree Roots

The digging around the driveway, grass section and clothes pole unearthed a bit of a problem for the job moving forward. Tree roots…

Tree roots.png

The job was not going to move forward until we dealt with this problem. Thankfully, friends of ours, David and Pamela Hutchison, put us in touch with Ronnie Barker who came out one Sunday to investigate. He then set us up with a stump grinder and operator.

Our next blog article will cover our suppliers to date so we will reveal how the stump was taken away next post.

Next post….Site Levels, Spreadsheets and Suppliers

Having agreed on the layout of the new garden and having made a start at clearing the site we were keen to break the job down into stages and to research potential suppliers for each section of the renovation. Neil made an excel spreadsheet that looked to keep tabs on and cover every cost of the job, from skips required to stump grinders to decking and paving blocks.

We quickly realised our budget was going to be very tight, if not unrealistic, but it gave us a target to try and stay near to at least!

We will share all next blog post.